This manual provides comprehensive guidance for setting up, operating, and maintaining your Howard Miller grandfather clock. It ensures proper assembly, precise timekeeping, and long-lasting performance.
Overview of the Manual and Its Importance
The Howard Miller Grandfather Clock Instruction Manual is an essential resource for owners, providing detailed guidance on setup, operation, and maintenance. It ensures proper assembly, functionality, and longevity of the clock.
The manual covers key components like the movement, pendulum, and weights, offering step-by-step instructions for initial setup and adjustments. It also addresses timekeeping accuracy, chime functions, and troubleshooting common issues.
By following the manual, users can optimize their clock’s performance and preserve its heirloom quality. Regular maintenance tips, such as cleaning and lubrication, are included to maintain precision and extend the clock’s lifespan.
This guide is indispensable for both new and experienced owners, ensuring their grandfather clock remains a reliable and beautiful timepiece for generations.
Key Components of the Howard Miller Grandfather Clock
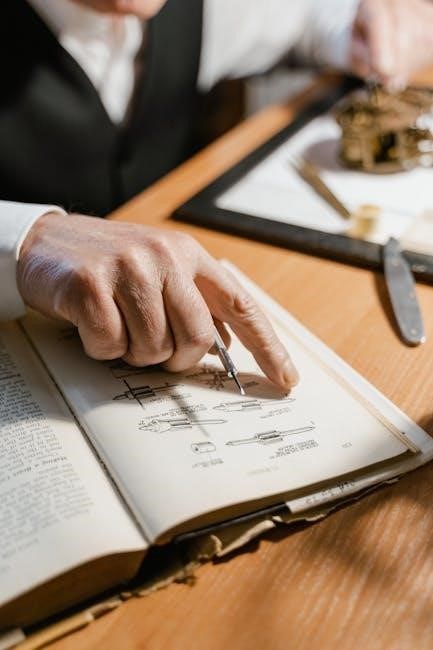
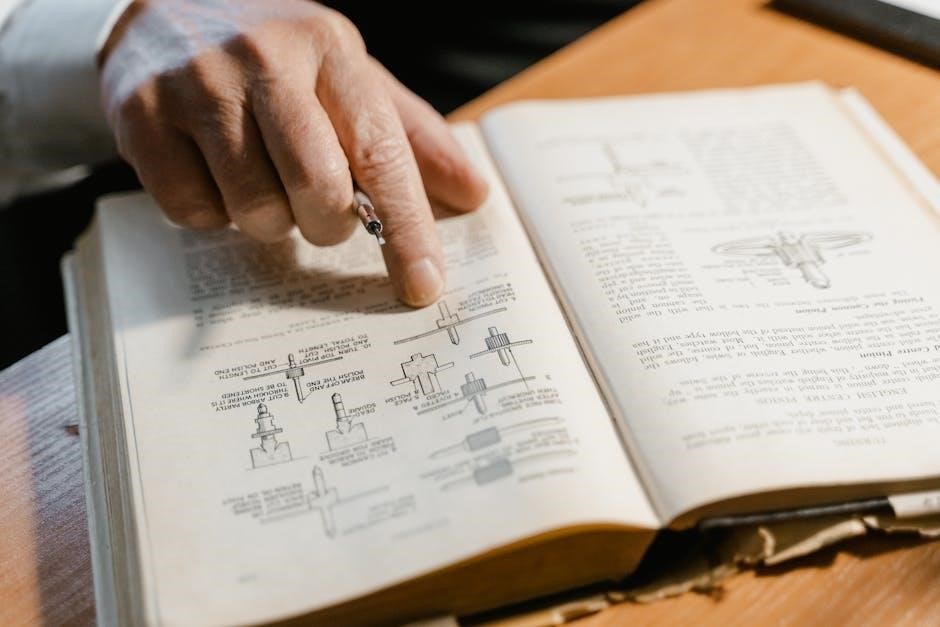
The Howard Miller Grandfather Clock features a mechanical movement, often sourced from renowned manufacturers like Kieninger, ensuring precise timekeeping. The pendulum and weights are crucial for operation, with the pendulum regulating the clock’s rhythm and the weights providing the power necessary for movement. The clock also includes chime rods and hammers that produce melodious sounds, enhancing its aesthetic appeal. Additional components such as levelers, access panels, and decorative elements like intricate carvings contribute to the clock’s stability, functionality, and visual charm. Understanding these elements is vital for proper setup and maintenance, ensuring the clock operates smoothly and maintains its heirloom quality.

Setting Up Your Howard Miller Grandfather Clock
Unpacking, assembling, and leveling are critical steps to ensure stability and proper alignment. Follow the manual’s guidance to install the pendulum and weights correctly.
Unpacking and Preparing the Clock for Assembly
Start by carefully unpacking the grandfather clock from its shipping box. Inspect all components for damage and ensure no parts are missing. Gently remove protective coverings and bubble wrap from the clock’s surfaces. Organize the hardware, such as screws, weights, and the pendulum, in a safe location. Before assembly, verify that all accessories, like keys and instructions, are included. It’s important to handle the clock’s delicate mechanisms with care to avoid damage. Once unpacked, place the clock on a sturdy, even surface to prepare for assembly. Consult the manual for specific unpacking and preparation steps tailored to your model.
Leveling the Clock for Maximum Stability
Proper leveling is essential for your grandfather clock’s stability and accurate timekeeping. Begin by placing the clock on a sturdy, even surface. Use a spirit level to ensure the clock is perfectly horizontal. Adjust the clock’s leveling feet by turning them clockwise or counterclockwise until the bubble in the spirit level is centered. Ensure the floor is firm and avoid placing the clock on uneven or soft surfaces, as this can cause instability. Double-check the level after assembly to confirm the clock’s alignment. Proper leveling prevents tipping and ensures smooth operation of the pendulum and weights, critical for consistent timekeeping accuracy and chime functionality.
Installing the Pendulum and Weights
Installing the pendulum and weights is crucial for your grandfather clock’s functionality. Start by attaching the pendulum to its hanger, ensuring it is securely fastened. Next, carefully lift each weight and hang them on their respective hooks, aligning them with the marked positions. The weights must be evenly spaced to maintain balance. Gently swing the pendulum to initiate movement. Avoid over-swinging, as this can cause instability. Ensure all components are properly seated and aligned. Correct installation guarantees smooth operation, consistent timekeeping, and harmonious chiming. Follow the manual’s specific instructions for your model to achieve optimal performance and longevity of your clock.

Operating the Grandfather Clock
Mastering the operation of your grandfather clock ensures precise timekeeping and smooth functionality. This section covers winding, setting the time, and managing chime features effectively for optimal performance.
Winding the Clock and Setting the Time
Winding your Howard Miller grandfather clock is essential for maintaining its operation. Use the provided winding key to wind the clock weekly, ensuring weights are fully raised. Avoid overwinding, as this can damage the mechanism. To set the time, gently turn the hour and minute hands counterclockwise. For accurate chime alignment, synchronize the time with the chime sequence. Always wind the clock when the weights are fully down to prevent damage. Regular winding ensures consistent timekeeping and preserves the clock’s longevity. Follow the manual’s specific instructions for precise winding techniques and time adjustment.
Understanding the Movement and Chime Functions
The movement of your Howard Miller grandfather clock is its mechanical heart, typically powered by weights and a pendulum; Designed by reputable manufacturers like Kieninger, it ensures precise timekeeping. The chime function enhances the clock’s ambiance, with melodies such as Westminster, Ave Maria, or Bim-Bam. Chimes are activated by solenoids or hammers striking rods. The clock often features an automatic chime shut-off option. Proper alignment of hammers and rods is crucial for clear sound. Regular maintenance, like cleaning and lubricating, keeps the movement and chimes functioning smoothly. Refer to the manual for troubleshooting chime malfunctions and adjustment tips to enjoy optimal performance and harmonious chimes.
Regulating the Timekeeping Accuracy
The Howard Miller grandfather clock’s timekeeping accuracy can be fine-tuned by adjusting the pendulum’s disk position. If the clock gains or loses time after 24 hours, raise or lower the disk to regulate its speed. Raising the disk speeds up the clock, while lowering it slows it down. Ensure the clock is level and stable to avoid misalignment of the pendulum. Regularly check the pendulum’s alignment and movement for smooth operation. For precise adjustments, refer to the manual’s troubleshooting section. Proper regulation ensures consistent timekeeping and extends the clock’s lifespan. Use high-quality synthetic oil, like Kieninger’s, for optimal performance.
Maintenance and Care
Regular maintenance ensures your Howard Miller grandfather clock’s longevity. Use high-quality synthetic oil for lubrication and clean the movement periodically. Always follow the manufacturer’s guidelines.
Cleaning and Lubricating the Clock Movement
Regular cleaning and lubrication are essential to ensure the longevity and smooth operation of your Howard Miller grandfather clock. Use a high-quality synthetic clock oil, as recommended by the manufacturer, to lubricate the movement. Gently clean the clock’s internal components with a soft, dry cloth to remove dust and debris. Avoid using harsh chemicals or abrasive materials, as they may damage the finish or harm the mechanism. The movement should be cleaned and oiled every 2-3 years, depending on usage. Proper maintenance will help maintain accurate timekeeping and preserve the clock’s heirloom quality for future generations.
Replacing Parts and Accessories

Replacing parts and accessories on your Howard Miller grandfather clock may be necessary over time to maintain its functionality and appearance. The manual specifies that items like keys, cranks, and shelf clips can be purchased directly from Howard Miller or authorized dealers. For models manufactured before 2015, certain parts may not be available for sale. It is crucial to use genuine Howard Miller parts to ensure compatibility and performance. Before attempting any replacements, refer to the manual for detailed instructions or contact customer support for assistance. This ensures the clock continues to operate efficiently and retains its value as an heirloom piece.

Troubleshooting Common Issues
This section addresses common problems like timekeeping inaccuracies and chime malfunctions, offering step-by-step solutions to ensure your grandfather clock operates smoothly and maintains its precise functionality.

Addressing Timekeeping Problems
If your grandfather clock gains or loses time, adjustments are necessary. Ensure the clock is level and stable, as uneven surfaces can disrupt accuracy. To regulate timekeeping, locate the pendulum adjustment nut. Raising the nut speeds up the clock, while lowering it slows it down. Allow 24 hours for the adjustment to take effect before making further changes. Avoid exposing the clock to direct sunlight or drafts, as these can affect performance. Regularly check the movement for proper alignment and lubrication. If issues persist, consult the manual or contact Howard Miller support for professional guidance to maintain precise timekeeping and ensure longevity.
Fixing Chime Malfunctions
To address chime malfunctions on your Howard Miller grandfather clock, start by ensuring the clock is properly set up. Verify that the time is accurate and the chime selector is correctly positioned. Check the chime cables and rods for proper alignment and connection. Gently adjust any misaligned rods or hammers to ensure they strike correctly. Clean the chime assembly to remove dust, which may interfere with sound quality. Ensure the weights are properly wound for consistent operation. If issues persist, consult the manual or contact Howard Miller support for further assistance to restore the chimes to proper function.

Warranty and Manufacturer Support
Howard Miller offers a comprehensive warranty covering defects in materials and workmanship. For inquiries, contact their customer service via phone, email, or the official website for assistance.

Understanding the Warranty Coverage
Howard Miller grandfather clocks are backed by a comprehensive warranty that covers defects in materials and workmanship. The warranty period varies by model, ensuring protection for your investment. It typically includes repair or replacement of defective parts, excluding normal wear and tear. For clocks manufactured after 2015, most components are covered, while older models may have limited options for replacement parts. Proper maintenance, such as using recommended clock oil, is essential to uphold warranty validity. Visit the official Howard Miller website or contact their customer service for detailed warranty terms and conditions specific to your clock model.
Contacting Howard Miller Customer Service
For assistance with your grandfather clock, Howard Miller offers dedicated customer support. Visit their official website to access contact information, including phone numbers, email, and a contact form. You can also download manuals and guides directly from their site. Representatives are available to help with troubleshooting, warranty claims, and parts replacement. Ensure you have your clock’s model number and serial number ready for efficient service. Howard Miller’s commitment to customer satisfaction ensures your inquiries are addressed promptly, providing peace of mind for any clock-related concerns.