Marie Callender’s Pumpkin Pie Instructions: A Comprehensive Guide
Embark on a delightful journey with Marie Callender’s pumpkin pie, a Thanksgiving staple! This guide provides detailed instructions,
from oven preparation to enhancing flavors, ensuring a perfect, homemade-tasting experience. Discover secrets to a flaky crust and a rich, spiced filling.
Understanding the Appeal of Marie Callender’s Pumpkin Pie
Marie Callender’s frozen pumpkin pie consistently receives praise for its remarkably homemade taste, offering a convenient alternative to entirely from-scratch baking. Experts, including seasoned 60-year pie makers, acknowledge its exceptional quality, often stating it’s the closest commercially available option to a truly homemade pie.
The appeal lies in a carefully balanced recipe featuring quality pumpkin, a blend of warming spices like nutmeg and cinnamon, and a perfectly flaky crust – a crucial element often highlighted in comparisons. It’s a dessert that evokes nostalgic Thanksgiving memories, providing a comforting and familiar flavor profile without the extensive preparation time.
For those seeking a stress-free holiday, or simply a delicious pumpkin pie any time of year, Marie Callender’s offers a reliable and satisfying choice. Its consistent quality and ease of preparation make it a popular selection for both experienced bakers and those less confident in the kitchen.
Why Choose a Frozen Pumpkin Pie?
Opting for a frozen pumpkin pie, like Marie Callender’s, presents a compelling solution for busy schedules and varying baking skill levels. While homemade pies are cherished, the time commitment can be substantial, especially during the hectic holiday season. Frozen pies offer a significant convenience factor, allowing you to enjoy a classic dessert without hours spent in the kitchen.
Furthermore, frozen pies provide consistency. Achieving the perfect crust and filling texture can be challenging, but pre-made options ensure a reliable outcome every time. They are also a practical choice for smaller gatherings or when a full-sized pie is desired without the effort of making one from scratch.
Ultimately, choosing frozen doesn’t compromise on taste; Marie Callender’s, in particular, is lauded for its homemade flavor, bridging the gap between convenience and quality.
The Convenience Factor
Marie Callender’s frozen pumpkin pie dramatically simplifies the dessert preparation process, offering unparalleled convenience. Eliminating the need for crust creation and complex filling recipes saves valuable time, particularly crucial during busy holiday seasons. The pre-assembled pie requires minimal effort – simply remove it from the freezer and follow the straightforward baking instructions.
This convenience extends to ingredient sourcing; all necessary components are already perfectly proportioned within the frozen pie. There’s no need to measure spices, prepare pumpkin puree, or worry about achieving the correct consistency. This makes it an ideal option for novice bakers or those seeking a stress-free dessert solution.
The ease of preparation allows you to focus on other aspects of your meal and spend more quality time with loved ones, without sacrificing a delicious, traditional pumpkin pie;
Taste and Quality Comparisons
Experts consistently praise Marie Callender’s frozen pumpkin pie for its remarkably homemade taste, often comparing it favorably to scratch-made versions. Many seasoned pie bakers, like Helen with 60 years of experience, acknowledge its exceptional quality, noting it’s the closest store-bought option to a truly homemade pie. The pie boasts a flaky crust, a key element in achieving a satisfying texture.
The filling is lauded for its rich, spiced flavor, attributed to a well-balanced blend of cinnamon, nutmeg, and other aromatic spices. While some homemade recipes may offer customization, Marie Callender’s provides a consistently delicious and reliable result. The use of quality pumpkin puree and evaporated milk contributes to the pie’s creamy texture and authentic flavor profile.
Ultimately, it delivers a convenient and high-quality dessert experience, rivaling many homemade alternatives.

Preparing to Bake: Essential Steps
Before baking, carefully check the packaging and ingredients. Preheat your oven to 315°F and place the pie on a baking sheet to prevent potential spills during baking.
Checking the Packaging and Ingredients
Begin by thoroughly inspecting the Marie Callender’s frozen pumpkin pie packaging for any signs of damage, such as tears or punctures, which could compromise the pie’s quality. Ensure the plastic wrapper is intact and securely sealed. Confirm the “best by” date to guarantee freshness.
Once opened, briefly review the ingredient list, especially if anyone has allergies. The core components include pumpkin, evaporated milk, sugar, eggs, and a blend of warming spices like nutmeg and cinnamon.
It’s worth noting that some bakers suggest supplementing the existing spice blend for a more pronounced flavor profile, but the pre-mixed blend is designed for a classic taste. The filling will appear somewhat runny before baking, which is perfectly normal; it sets during the baking process.
Finally, verify you have a suitable baking sheet readily available for the next step, preventing any potential messes in your oven.
Preheating the Oven: Temperature is Key
Achieving the correct oven temperature is paramount for a perfectly baked Marie Callender’s pumpkin pie. Preheat your conventional oven to 315 degrees Fahrenheit (approximately 157 degrees Celsius). Accurate temperature ensures even cooking and prevents a cracked filling or soggy crust.
Allow sufficient time for the oven to fully preheat – typically 15-20 minutes – before placing the pie inside. Using an oven thermometer is highly recommended to verify the internal temperature, as ovens can sometimes be inaccurate. Consistent heat distribution is crucial.
Avoid opening the oven door frequently during baking, as this can cause temperature fluctuations. A stable temperature is vital for the pie to set properly. Remember, a slightly lower temperature over a longer baking time often yields better results than a high temperature and a short bake.
Proper preheating sets the stage for a delicious, Thanksgiving-worthy dessert!
Using a Baking Sheet: Preventing Spills
Protect your oven from potential messes by always baking Marie Callender’s pumpkin pie on a baking sheet. The pie filling, especially during the initial baking stages, can be quite runny and prone to bubbling over the edges of the pie dish. A baking sheet acts as a safety net, catching any spills and simplifying cleanup.
Choose a baking sheet that is slightly larger than the pie itself, providing ample space to contain any overflow. Line the baking sheet with parchment paper or aluminum foil for even easier cleanup. This prevents the filling from sticking and makes removing the pie a breeze.
Several sources emphasize this step, noting the filling often fills the crust to the rim initially. A baking sheet is a simple precaution that can save you considerable oven cleaning time and effort. It’s a small step with a big impact!
Thawing Considerations (If Applicable)
Generally, Marie Callender’s frozen pumpkin pie doesn’t require thawing before baking, and baking from frozen is perfectly acceptable and often recommended for optimal texture. However, if you prefer, or if your oven isn’t exceptionally efficient, a partial thaw can slightly reduce baking time.
If thawing, do so in the refrigerator for several hours – ideally overnight – to ensure even thawing and maintain food safety. Avoid thawing at room temperature, as this can encourage bacterial growth. A partially thawed pie will still require the full recommended baking time, though you might observe a slightly softer crust.
Baking directly from frozen results in a firmer filling and a flakier crust, as the frozen state helps maintain the structure during baking. Regardless of your choice, always remove the plastic wrapper before baking!
Baking Instructions: The Core Process
Begin by preheating your oven to 315°F (157°C). Remove the plastic wrapper, place the pie on a baking sheet, and bake for 70-80 minutes,
or until golden brown.
Conventional Oven Baking Time & Temperature
Achieving the perfect bake with Marie Callender’s frozen pumpkin pie in a conventional oven requires precise temperature control and timing. Begin by preheating your oven to a consistent 315 degrees Fahrenheit (approximately 157 degrees Celsius). This lower temperature is crucial for ensuring the filling sets evenly without cracking or burning.
Once preheated, carefully remove the plastic wrapper from the pie. Placing the pie on a baking sheet is highly recommended; this will catch any potential spills and simplify cleanup. Position the pie centrally within the oven for even heat distribution. The typical baking time ranges from 70 to 80 minutes, but this can vary depending on your oven’s calibration.
It’s important to avoid opening the oven door frequently during baking, as this can cause temperature fluctuations. Consistent heat is key to a beautifully set pumpkin pie. Remember to monitor the pie’s progress visually, looking for the cues that indicate doneness, which will be discussed in the following section.
Monitoring the Baking Process
Throughout the 70-80 minute baking period, subtle changes will indicate the pie’s progress. Initially, the crust will remain pale, and the filling will appear quite liquid. As baking continues, the crust will gradually turn golden brown, and the filling will begin to thicken around the edges.
Avoid the temptation to open the oven door excessively, as temperature fluctuations can hinder even baking. However, a quick peek around the 60-minute mark can be helpful. You’ll notice the filling becoming less translucent and starting to set. Be mindful that the center will likely still appear slightly jiggly – this is normal!
The aroma filling your kitchen is also a good indicator; a warm, spiced pumpkin scent will intensify as the pie nears completion. Remember, visual cues are more reliable than time alone. Continue baking until the filling is mostly set, with only a slight wobble in the center.
Determining Doneness: Visual Cues
Successfully gauging doneness relies heavily on observing key visual indicators. The pie is ready when the filling has mostly set, but retains a slight wobble in the center – avoid overbaking, which leads to cracking. The edges of the filling should appear firm and pull away slightly from the crust.
The crust should be a beautiful, consistent golden brown color. A pale or unevenly colored crust suggests more baking time is needed. Gently tap the side of the pie; a slight jiggle in the center is acceptable, but excessive movement indicates it requires further baking.
A knife inserted near the center shouldn’t come out completely clean, but should meet some resistance. Remember, the filling will continue to set as it cools, so err on the side of slightly underbaked rather than overbaked. Trust your instincts and these visual cues for a perfect result!
Adjusting Baking Time for Different Ovens
Oven variations significantly impact baking times, demanding careful adjustments. If your oven runs hot, reduce the baking temperature by 25 degrees Fahrenheit and check for doneness 10-15 minutes earlier than the recommended 70-80 minutes. Conversely, a cooler oven may require an extra 10-20 minutes of baking.
Convection ovens generally bake faster; reduce the temperature by 25 degrees Fahrenheit and monitor closely. Rotating the pie halfway through baking ensures even cooking, especially in ovens with hot spots. Always use an oven thermometer to verify the internal temperature for accuracy.
Pay close attention to the visual cues – a golden-brown crust and a slightly wobbly center – regardless of the time. Initial baking attempts may require slight adjustments to find the sweet spot for your oven. Patience and observation are key!
Enhancing Your Marie Callender’s Pie
Elevate your experience with delightful additions! Explore classic whipped cream toppings, spice infusions, and crust enhancements for a truly personalized and unforgettable pumpkin pie.
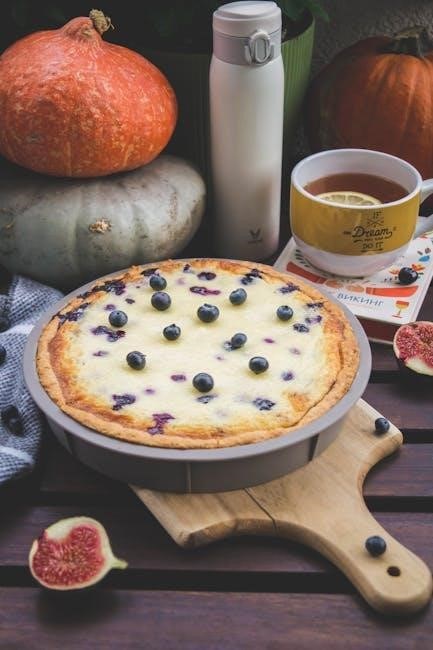
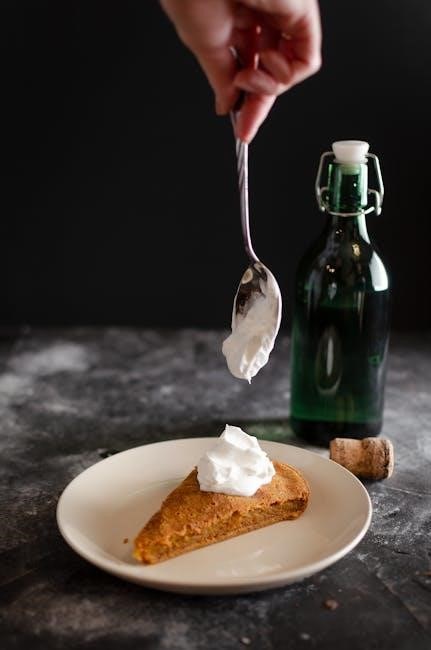
Whipped Cream Toppings: Classic Choices
A dollop of whipped cream is the quintessential partner to Marie Callender’s pumpkin pie, enhancing its flavors and creating a visually appealing dessert. For a truly classic experience, opt for freshly whipped cream – it’s surprisingly easy to make! Simply combine one cup of heavy cream with two tablespoons of powdered sugar and a teaspoon of vanilla extract.
Whip using an electric mixer until soft peaks form. Avoid over-whipping, as this can result in a grainy texture. Alternatively, store-bought whipped cream is a convenient option, but fresh cream offers a superior taste and texture. Consider flavored whipped creams, such as cinnamon or maple, to complement the pumpkin spice. A sprinkle of nutmeg on top of the whipped cream adds a beautiful aroma and visual touch. Experiment with different piping techniques for an elegant presentation, or simply spoon it generously over each slice.
Spice Additions: A Flavor Boost
While Marie Callender’s pumpkin pie boasts a delightful spice blend, a subtle enhancement can elevate the flavor profile even further. Consider adding a pinch of ground ginger, allspice, or cloves to your whipped cream topping for a warm, inviting aroma. A dash of cinnamon directly onto the pie before baking can intensify the classic pumpkin spice notes.
For a more adventurous twist, experiment with cardamom or star anise – these spices offer unique, complex flavors that pair beautifully with pumpkin. Remember, a little goes a long way! Start with ¼ teaspoon of any additional spice and adjust to your preference. Some bakers even suggest a tiny grating of fresh nutmeg over the finished pie for an extra layer of warmth. Quality spices are key; fresh, potent spices deliver the most impactful flavor boost, transforming a good pie into an exceptional one.
Crust Enhancement Techniques
Achieving a truly exceptional Marie Callender’s pumpkin pie experience often hinges on the crust. While the pre-made crust is convenient, a few simple techniques can significantly improve its texture and flavor. Brushing the crust with a beaten egg wash before baking promotes a golden-brown, glossy finish. Sprinkling granulated sugar along the edges adds a delightful crunch and sweetness.
For a richer flavor, consider blind-baking the crust for 10-15 minutes before adding the filling – this helps prevent a soggy bottom. Some bakers recommend chilling the assembled pie for 30 minutes before baking to firm up the crust. To mimic the flaky perfection of Marie Callender’s crust, lightly dust the baking sheet with flour before placing the pie to prevent sticking and ensure even baking. A touch of almond extract in the crust can also add a subtle, sophisticated nuance.
Serving Suggestions: Beyond the Slice
Elevate your Marie Callender’s pumpkin pie experience beyond the traditional slice! While a generous dollop of whipped cream remains a classic pairing, explore exciting variations. Consider a swirl of lightly sweetened mascarpone cheese for a creamy, Italian-inspired twist. A sprinkle of toasted pecans or walnuts adds delightful texture and nutty flavor.
For a more decadent treat, drizzle with salted caramel sauce or a rich chocolate ganache. A scoop of vanilla bean ice cream alongside a warm slice creates a comforting dessert. Don’t limit yourself to Thanksgiving; pumpkin pie is perfect year-round! Pair it with a cup of hot coffee or spiced cider for a cozy autumn evening. Miniature pumpkin pies are also charming for individual servings and parties.
Troubleshooting Common Issues
Encountering problems? Cracked filling, soggy crust, or uneven baking can occur. Addressing these issues ensures a perfect pie. Solutions and adjustments are readily available for optimal results!
Cracked Pie Filling: Causes and Prevention
A cracked pumpkin pie filling is a common concern, often stemming from rapid temperature changes or overbaking. The quick expansion and contraction of the custard can create stress, leading to surface fissures. To prevent this, ensure your oven temperature is accurate – an oven running too hot is a primary culprit.
Baking the pie on a baking sheet, as recommended, helps distribute heat more evenly. Avoid opening the oven door frequently during baking, as temperature fluctuations can exacerbate cracking. If cracks appear, don’t panic! They don’t necessarily affect the taste.
Consider reducing the baking temperature slightly, or tenting the pie loosely with foil during the latter part of the baking time. A water bath, while more involved, provides gentle, even heat and minimizes cracking. Remember, a slightly imperfect appearance doesn’t diminish the deliciousness of Marie Callender’s pumpkin pie!
Soggy Crust: Avoiding Moisture Problems
A soggy bottom crust is a frequent pie-baking challenge, often caused by excess moisture from the filling. To combat this with Marie Callender’s frozen pie, ensuring proper baking is crucial. Baking the pie directly on a baking sheet acts as a shield, catching any potential drips and protecting the crust.
Pre-baking the crust, though not typically necessary with a frozen pie, can provide an extra layer of protection. However, be careful not to overbake it during this initial stage. The filling’s natural moisture content, especially as it bakes, can contribute to sogginess.
Ensure the oven is fully preheated before placing the pie inside. Consistent heat helps set the crust and minimize moisture absorption. Allowing the pie to cool completely on a wire rack after baking also aids in preventing a soggy crust, as it allows air to circulate underneath.
Uneven Baking: Ensuring Consistent Results
Achieving a uniformly baked Marie Callender’s pumpkin pie requires attention to oven conditions and placement. Ovens often have hot spots, leading to uneven browning or cooking. Rotating the pie halfway through the baking process is a simple yet effective solution, ensuring all sides receive equal heat exposure.
Using an oven thermometer is highly recommended to verify the oven’s actual temperature, as discrepancies can significantly impact baking results. Placing the pie in the center of the oven rack promotes even heat distribution. Avoid opening the oven door frequently during baking, as this causes temperature fluctuations.
If you notice the crust browning too quickly, gently cover the edges with aluminum foil to prevent burning while the center continues to bake. Consistent monitoring and these adjustments will yield a beautifully and evenly baked pumpkin pie.
Pie Filling Too Runny: Solutions and Adjustments
Encountering a runny Marie Callender’s pumpkin pie filling can be concerning, but often easily remedied. The filling is described as runny before baking, so some initial liquidity is expected. However, if it remains excessively liquid after the recommended baking time, adjustments are necessary.
Firstly, ensure the pie has been baked for the full 70-80 minutes, or even slightly longer, checking for doneness cues. If still runny, carefully remove the pie from the oven and allow it to cool completely. Cooling often allows the filling to set as the starches gelatinize.
For future attempts, consider slightly increasing the baking time or temperature (in small increments) to promote more thorough cooking. Avoid overmixing the filling ingredients, as this can hinder proper setting. A little patience and these adjustments will result in a perfectly set, delicious pie.
Recipe Replication: Homemade Inspired
Inspired by Marie Callender’s success, recreate the magic at home! Focus on a flaky crust, quality pumpkin, and a balanced spice blend for an authentic flavor profile.
Recreating the Crust: Flaky Perfection
Achieving a crust rivaling Marie Callender’s requires attention to detail. The key lies in the flour-to-shortening ratio, aiming for a delicate, flaky texture. Begin with all-purpose flour, chilled shortening, and a touch of salt. Cut the shortening into the flour until the mixture resembles coarse crumbs – avoid overmixing!
Gradually add ice water, one tablespoon at a time, mixing until the dough just comes together. Form the dough into a disc, wrap it tightly in plastic wrap, and refrigerate for at least 30 minutes. This chilling period is crucial for developing gluten and preventing shrinkage during baking.
On a lightly floured surface, roll out the dough to fit your pie plate. Gently press it into the plate, crimping the edges for a decorative finish. Pre-baking the crust (blind baking) for 10-15 minutes can help prevent a soggy bottom, especially when using a wetter filling. Remember, a truly exceptional pie starts with an exceptional crust!
Pumpkin Filling Ingredients: A Closer Look
The heart of Marie Callender’s pumpkin pie lies in its flavorful filling. Canned pumpkin forms the base, providing that classic autumnal taste. However, quality matters – opt for 100% pumpkin puree, not pumpkin pie filling, which already contains spices and sugar. Evaporated milk contributes to the creamy texture, offering a richness that sets this pie apart.
Sugar, of course, provides sweetness, but the real magic happens with the spices. Cinnamon and nutmeg are essential, but don’t underestimate the subtle warmth of ginger or allspice. Two eggs bind the ingredients together, creating a smooth, custard-like consistency.
A dash of salt enhances the flavors, balancing the sweetness. Some recipes suggest a touch of vanilla extract for added depth. Combining these ingredients thoughtfully, and ensuring they are well-mixed, is key to replicating that beloved Marie Callender’s flavor profile.
Spice Blend Secrets: Achieving Authentic Flavor
Unlocking the authentic Marie Callender’s pumpkin pie flavor hinges on mastering the spice blend. While cinnamon and nutmeg are foundational, the proportions are crucial. A generous dose of cinnamon provides warmth, while nutmeg adds a subtle, nutty complexity. Don’t shy away from experimenting – a pinch of ginger introduces a gentle zing, and allspice offers a layered aroma.
Many home bakers find success by starting with a base of 1 teaspoon cinnamon, ½ teaspoon nutmeg, and ¼ teaspoon each of ginger and allspice per standard 15-ounce can of pumpkin. However, taste is subjective! Adjusting these ratios allows you to personalize the flavor.
Freshly ground spices deliver a more potent aroma and flavor compared to pre-ground. Consider toasting the spices lightly before mixing to further enhance their fragrance. Remember, the goal is a harmonious blend that complements the pumpkin, not overpowers it.
Simplified Homemade Pumpkin Pie Recipe
Inspired by Marie Callender’s, this recipe offers a streamlined path to pumpkin pie perfection. Begin with two pre-made, frozen pie crusts for convenience. In a large bowl, combine one 15-ounce can of pumpkin puree, ¾ cup granulated sugar, ½ teaspoon salt, 1 teaspoon cinnamon, ½ teaspoon nutmeg, and ¼ teaspoon each of ginger and allspice.
Whisk in two large eggs, then gradually add ¾ cup of evaporated milk, mixing until smooth. Carefully pour the filling into the prepared pie crusts, filling almost to the rim. Place the pies on a baking sheet to catch any potential spills.
Bake in a preheated oven at 315°F (157°C) for 70-80 minutes, or until the filling is set but still slightly jiggly in the center. Cool completely before serving, and enjoy a taste reminiscent of a classic!